This is Marybeth's stitching blog. Follow along with my progress. Leave a comment, let me know you stopped by.
Thursday, January 28, 2010
Sunday, January 24, 2010
Friday, January 22, 2010
Huck Weaving Sewing Case
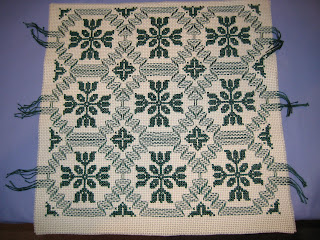
Completed the huck weaving sewing case tonight. The assembly was actually quite easy.
Sunday, January 17, 2010
Tuesday, January 12, 2010
Freezing Fog
Monday, January 11, 2010
1/11/2010 Stitching update
Saturday, January 09, 2010
Embroidery on Paper
Class taught by Marybeth Markland on March 24, 2006 at the Tri-State NeedleArts Retreat in Sinsinawa, WI.
Your kit contains·
Supplies needed
Instructions for stitching
Prepare the pattern
Prick the holes
Stitch the card
Instructions for finishing a card
Reference
Books
Web sites
Your kit contains·
- Instructions and 3 Patterns
- 2 blank cards
- 1 needle
- 1 T-pin
- Card stock
Supplies needed
- Scissors
- Old mouse pad or other surface to use for pricking cards
- Floss and thread
- Decorative paper
- Tape
- Decorative scissors
- Markers
- Stamps and ink for card messages
Instructions for stitching
Prepare the pattern
- Trim the pricking pattern to the desired size. It should be just a bit smaller than your card.
- Place the pattern on the card, and secure it in place. You may use removable tape, or just stick regular clear tape to your sweater once or twice to make it less sticky.
Prick the holes
- Using the T-pin, or other piercing tool, prick holes as marked on the pattern keeping the tool perpendicular to the card. Be sure to go all the way through the card.
- Hold the card up to the light to be sure you have pierced all the holes.
- Carefully, remove the pattern from the card.
Stitch the card
- Thread a needle with the floss. Use a needle slightly smaller than your piercing tool. Do not make your floss length too long. The card will wear the floss more quickly than fabric does.
- Secure the thread to the back of the card with a little clear tape. Be sure not to tape over any of your holes!
- Following the instructions for your pattern, coming up at the hole indicated.
- Use tape to secure your threads at the back of the card.
Instructions for finishing a card
- Secure your threads with tape on the back of the card, and trim any loose ends.
- Trim your stitching to the desired size, using decorative scissors, if desired.
- (optional) Attach your stitching to decorative paper using glue or double stick tape and trim.
- Attach stitching to the greeting card using double stick tape or glue.
- Sign and send your card.
Reference
Books
- Embroidery on Paper by Erica Fortgens
- Creative Embroidery on Paper by Erica Fortgens
- Embroidery on Paper for Every Occasion by Joke De Vette, Adriaan De Vette
- Curve Stitching: Art of Sewing Beautiful Mathematical Designs by Jon Millington
Web sites
- Erica's Embroidery on Paper - This site has good hints and tips http://www.ecstasycrafts.com/catalog.php?category=4
- Paper Embroidery - This site has a few free patterns http://www.cardsandcrafts.freeservers.com/embrinst.html
- Craft Creations - Lots of free craft projects (click on Free Craft Projects) for cards. Some use cross stitch or hardanger too. For embroidery on paper cards, check out issues: 6, 9, 11, 17, 19, 20 , 21, 22, 25, 27, 31, 33, 34, 36 http://www.craftcreations.co.uk/
- For a demonstration with photos go to http://www.cardinspirations.co.uk/demofal.htm
Tuesday, January 05, 2010
New Years Stitching Plans
Ok, so it's been 5 months since I posted. UGH!
I decided to note the plans I have to finish projects this year. There are 4.
I have started the queen anne's lace

I decided to note the plans I have to finish projects this year. There are 4.
- Queens Anne's Lace
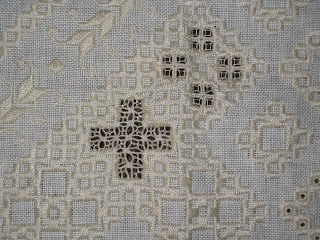
- Hardanger Scissor Fob
- Pin Cubes (guild project)
- Herb farm Sampler (guild project)
I have started the queen anne's lace

Subscribe to:
Posts (Atom)


